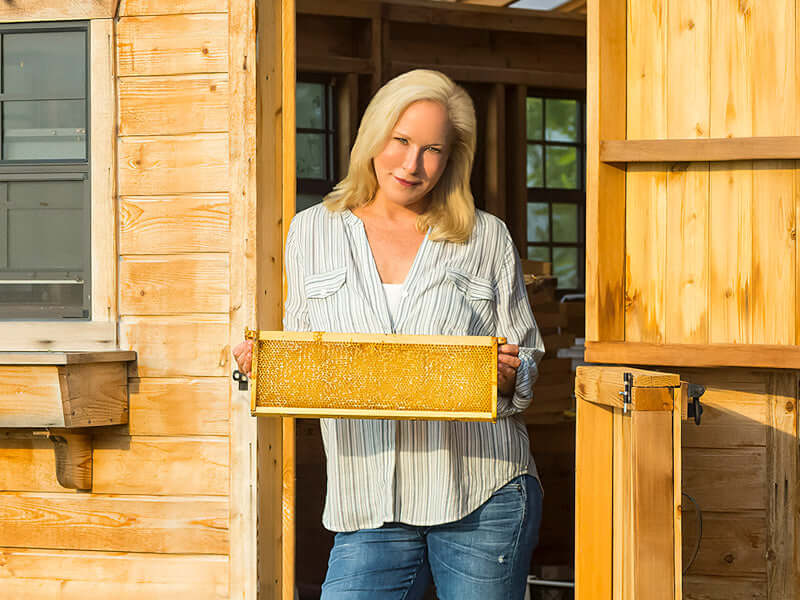
Every time we harvest honey here at Chesterhaven Beach Farm, we end up with something just as precious as the honey itself: beeswax. After uncapping frames and spinning out the honey, we're left with a small mountain of golden cappings — the purest wax in the hive. And once we've filtered it down into clean, smooth blocks, the question every beekeeper eventually asks comes up: now what?
If you've been sitting on a stash of beeswax from a harvest, or you've picked some up from a local beekeeper and aren't quite sure what to do with it, you're in the right place. Beeswax is one of nature's most versatile materials. It's been used for thousands of years — as a candle, a sealant, a cosmetic, and a craft medium — and it's just as useful today. Here's a look at some of our favorite ways to put it to work.

What Is Beeswax, Exactly?
Before we dive in, a quick primer. Beeswax is produced by young worker honeybees from special glands on the underside of their abdomens. The bees secrete tiny wax flakes, chew and soften them with their mandibles and saliva, then use that pliable material to build the hexagonal cells that make up the honeycomb. It's the structural foundation of the entire hive — used to store honey, raise brood, and seal everything in place.
When beekeepers harvest honey, they slice off the thin wax "cappings" that seal each cell. Those cappings, along with any comb that gets trimmed or replaced, become raw beeswax. After filtering and cleaning, what you're left with is a beautiful, golden block of wax that smells faintly of honey and propolis — and it's ready for just about anything.
Want to learn more about the process before you jump into projects? We've got a full guide on processing beeswax from hive to finished block, and another on the origins of beeswax if you're curious about the biology behind it.
Beeswax Uses for Skincare and Personal Care
This is where beeswax really shines in terms of everyday utility. It's been a foundational ingredient in cosmetics for centuries, and for good reason. Beeswax is a natural emollient — it creates a soft, conditioning barrier on the skin that helps hold moisture in without feeling heavy or occlusive. It also has a naturally waxy texture that gives homemade cosmetics body and structure, making it ideal for products that need to be solid at room temperature.

Lip Balm
Lip balm is probably the most popular beeswax project, and it's a great entry point if you've never worked with wax before. The basic formula is simple: melt beeswax with a carrier oil (coconut oil, sweet almond oil, or sunflower oil are all wonderful) and pour into small tins or tubes. Add a touch of honey for a naturally sweet finish, a drop of essential oil for scent, or leave it plain. The beeswax gives the balm its structure; the oils do the conditioning work.
It's worth knowing that this is actually how our Plastic-Free Honey Lip Balm got its start. Our original formula — once called Sweet Lips — was built on beeswax from our own hives, and that foundation hasn't changed. If you'd rather skip the DIY and go straight to the real thing, our lip care collection has you covered.
Body Lotion Bars
Lotion bars are a clever twist on traditional moisturizer — they're solid until they touch your skin, then they melt with body heat and absorb like a rich lotion. Combine melted beeswax with shea butter and a generous pour of your favorite carrier oil. Pour into silicone molds (heart shapes, bee shapes, whatever makes you happy) and let them set. The result is a palm-sized bar that you can rub directly onto dry elbows, heels, or hands. No pump, no spill, no plastic bottle.
Solid Perfume
Solid perfumes are another satisfying project. They're portable, last longer than spray versions, and contain no alcohol — just wax, a carrier oil like jojoba, and your favorite essential oils or perfume blend. Melt the beeswax and oil together, stir in your fragrance once the mixture has cooled slightly (heat drives off volatile compounds), and pour into small tins. The wax holds everything in a solid form that you can dab onto pulse points just like a traditional perfume.
Natural Deodorant
Beeswax is a surprisingly useful ingredient in DIY deodorants. It functions as a thickener and binder, helping to keep the formula solid and easy to apply. Combined with coconut oil, arrowroot powder, baking soda, and a few drops of essential oil, it creates a smooth bar that glides on without a greasy residue.
Beeswax Uses Around the Home
Beyond personal care, beeswax is an incredibly practical household material. It's water-resistant, long-lasting, and doesn't require any special storage. A single block can last for years and serve dozens of purposes around the house.

Wood Furniture Polish
One of the oldest uses for beeswax is wood polish, and it holds up beautifully. The process is simple: melt beeswax and combine it with a nourishing oil like mineral oil or olive oil in roughly a 1:4 ratio (more wax for a firmer paste, more oil for a softer one). Let it cool into a paste, then rub it into wooden surfaces with a clean cloth. Buff to a warm, low-sheen finish. It conditions the wood, creates a protective layer against water and scratches, and smells gently of honey — a big improvement over chemical-heavy commercial polishes.
This works equally well on cutting boards, wooden spoons, and butcher block countertops. For food-contact surfaces, stick with food-safe oils like mineral oil, fractionated coconut oil, or linseed oil.
Lubricant for Stuck Drawers, Zippers, and Screws
This is one of those uses you'll want to remember every time you're wrestling with a stuck drawer or stubborn zipper. A quick rub of a beeswax block along the drawer slides or zipper teeth reduces friction dramatically. Same trick works for wood screws going into hard wood — run the tip of the screw across a wax block before driving it in, and it goes in much more easily. Simple, zero-cost, and effective.
Waterproofing Leather and Canvas
Beeswax has been used to waterproof leather boots, canvas bags, and outdoor gear for generations. Rub a warm wax block into the surface of clean, dry leather and work it in with your fingers or a soft cloth. Apply gentle heat from a hairdryer to help the wax penetrate. The wax fills the pores of the leather and creates a water-repellent seal. Always do a test patch first to make sure the wax doesn't significantly change the color or finish of your item.
Reusable Beeswax Food Wraps
Beeswax wraps are one of the most popular zero-waste swaps in the kitchen, and they're completely DIY-able. You'll need cotton fabric (any weave works, but tightly woven fabric holds wax better), grated beeswax, and a bit of pine resin and jojoba oil — the resin is what gives the wrap its cling and durability. Lay the fabric on parchment paper, scatter the wax mixture over it, and place it in a low oven until the wax melts and saturates the cloth. Use a brush to spread evenly, let it cool, and you've got a reusable food wrap. They're washable in cold water and can be used dozens of times.

Candles
Beeswax candles are in a category of their own. They burn longer and cleaner than paraffin candles, and they have a natural, warm honey scent that doesn't need any added fragrance. The simplest version — a rolled beeswax taper — doesn't even require melting: just warm a beeswax sheet slightly, lay a cotton wick along one edge, and roll it up tightly. More advanced projects involve pouring melted wax into molds or jars, which takes more practice to get the wick placement and cool-down right, but produces a beautiful result.

Fire Starters
If you keep bees, you know that reliable hive smoke is essential — and reliable smoke starts with a good fire starter. Dipping pinecones, cotton balls, or even egg carton cups in melted beeswax creates a fire starter that lights quickly, burns long, and produces a pleasant, honey-like smoke. We actually have a full post on making beeswax fire starters from pinecones if you want step-by-step instructions.
Rust Prevention for Metal Tools
A light coat of beeswax on garden tools, saw blades, or cast iron creates a thin barrier against moisture and rust. Warm the tool slightly, rub on the wax, then buff off the excess. It's not a permanent solution, but for seasonal storage or tools you don't use constantly, it's a simple and natural way to extend their life.
Beeswax Uses for Art and Crafts
Beeswax has a long history as an artistic medium, and it's still actively used in fine art and craft today.

Encaustic Painting
Encaustic painting is an ancient Greek technique that uses heated beeswax mixed with tree resin and pigment to create layered, luminous paintings. The wax is applied in a molten state and fused to the surface with heat — the name literally means "to burn in." It's been practiced for over 2,000 years and still produces some of the most striking textural effects in contemporary art. We've got a full beginner's guide to encaustic painting techniques if you're curious about getting started.

DIY Crayons
Making crayons is a fun, kid-friendly project. Melt beeswax with a non-toxic pigment (cosmetic-grade mica powders work well, as do soap colorants) and pour into molds. Silicone molds in fun shapes are easiest for demolding. The resulting crayons are harder and longer-lasting than most commercial crayons, and they have a beautiful, translucent quality when used on paper.
Leaf Preservation
Dipping autumn leaves in melted beeswax preserves their color and makes them stiff enough to use in seasonal decor, wreaths, or ornaments. Work quickly — the wax sets fast — and hang the leaves to cool on a wire rack. The wax coating gives them a slight sheen and keeps them from crumbling.

Wax Ornaments and Holiday Decor
Melted beeswax poured into molds and cooled makes beautiful, golden ornaments with a natural honey scent. Add dried flowers, herbs, or a few drops of essential oil while the wax is still liquid. Once cooled, insert a ribbon loop for hanging. These make wonderful handmade gifts and hold their scent for a long time.

Eating Beeswax: Yes, It's a Thing
This one surprises people, but beeswax is completely edible. It's indigestible — it passes through your system without being absorbed — but that doesn't make it off-limits. In fact, the most delicious way to experience beeswax is by eating raw honeycomb, where the honey and wax come together exactly as the bees made them.
You can chew a piece of raw honeycomb like gum, letting the honey drain out as you work through the wax. Or you can slice it and serve it on toast, over aged cheese, alongside fruit, or drizzled with a little extra honey from the jar. The wax gives a satisfying chew, and the honey inside raw honeycomb is in its most intact, unfiltered form — no heat, no filtration, nothing removed.
Beeswax also has a long history of use in food preservation. Traditionally, a layer of wax was poured directly over finished jams and jellies to seal the jar. Certain cheeses are still coated in wax to prevent mold during the aging process. And in some traditional recipes, pans or molds are coated in beeswax and butter to create a non-stick surface.
A Few Tips Before You Start
Working with beeswax is straightforward, but a few basics will save you a lot of trouble:
Always use a double boiler. Beeswax is flammable at high temperatures and should never be melted directly over an open flame or in a pot sitting directly on a burner. Use a double boiler setup — a heat-safe container set over a pot of simmering water — and keep the temperature below 185°F (85°C) to prevent discoloration. The melting point of beeswax is around 145–147°F (63–64°C), so it doesn't need much heat to become fully liquid.
Never leave melting wax unattended. Beeswax has a flash point of around 400°F (204°C). That's a wide margin, but it's still a flammable material. Keep a watchful eye on your setup and have a fire extinguisher nearby.
Dedicate your equipment. Beeswax is notoriously difficult to clean from pots, spoons, and measuring cups. Use equipment you're happy to keep specifically for wax projects, or use disposable aluminum containers. To clean beeswax residue, heat the container until the remaining wax melts, then wipe it out while still warm.
Start with small batches. If you're new to working with wax, smaller batches give you more control over temperature, pour time, and cooling — and they're much easier to troubleshoot if something goes sideways.

Frequently Asked Questions
Where can I get beeswax?
The best source is a local beekeeper — especially if you can find one who doesn't use miticides or chemical treatments in their hives. Farmers markets, beekeeping supply stores, and online retailers are also good options. If you keep bees yourself, your cappings from honey harvest are your best source — cappings wax is the cleanest, freshest wax in the hive.
Does beeswax go bad?
Beeswax has an extremely long shelf life. Archaeological samples thousands of years old have been found still workable. Store your beeswax in a cool, dark, dry location away from dust and pests (wax moths will find it). A sealed container or zip bag works well for long-term storage.
Can I use beeswax pellets instead of blocks?
Yes — pellets and pastilles melt faster and more evenly than a solid block, which makes them convenient for small projects. The wax itself is the same; the format is just different. If you have a block, you can grate it to achieve a similar effect.
What's the difference between yellow and white beeswax?
Yellow beeswax is raw or minimally processed, retaining the natural color from pollen and propolis. White beeswax has been filtered and sometimes bleached to achieve a neutral color — it's preferred for light-colored cosmetic products where you don't want the wax to affect the final hue. For most home projects, yellow beeswax is perfectly suitable and tends to have a richer, more complex scent.
Is all beeswax the same quality?
Not exactly. Cappings wax (from honey harvest) is generally the purest and freshest, while old brood comb wax tends to be darker, more contaminated with cocoons and propolis residue, and requires more filtering. For cosmetics or candles, cappings wax is the better starting point. For fire starters or wood polish, brood comb wax is perfectly fine after a good filtering.
Do I need any special equipment to get started?
Not much. A dedicated double boiler setup, a thermometer, a silicone spatula, and some molds or containers will get you through most beginner projects. As your projects get more involved, you might add a wax-specific scale, a pour pot, and better molds — but for lip balm, fire starters, or wood polish, you can get started with very basic kitchen equipment.