



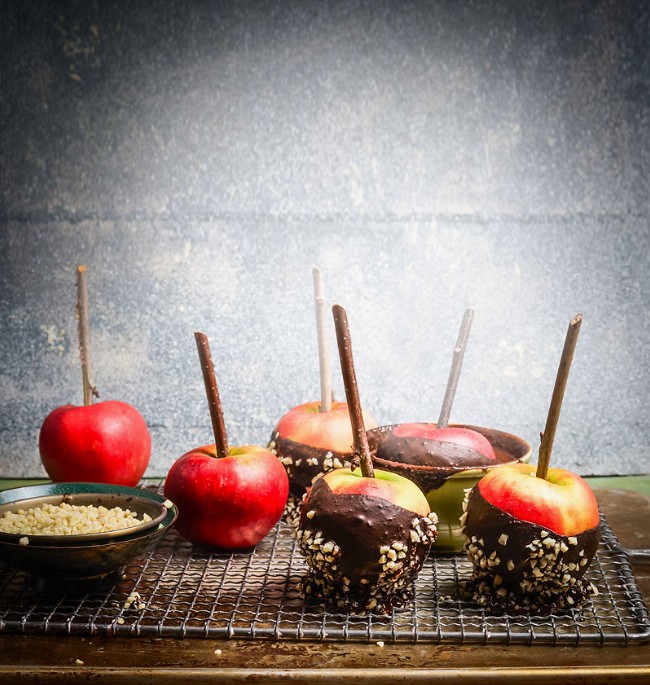
When the air turns crisp and the leaves start to turn, chocolate covered apples become one of those treats that signals fall has officially arrived. This recipe brings tart, crunchy apples together with a rich, glossy chocolate coating sweetened with minimally filtered honey, creating the kind of homemade chocolate apples that disappear fast at Halloween parties and weekend family gatherings.
A little kitchen history: chocolate covered apples have a close cousin in the caramel apple, which was invented in the 1950s by a Kraft Foods employee named Dan Walker. He had unsold caramels left over from Halloween and started experimenting with apples, and the rest is autumn snack-table history. This chocolate apple recipe takes that same idea in a slightly richer direction, swapping caramel for a smooth honey-sweetened chocolate coating that sets up beautifully and tastes like something you’d expect from a confectionery shop, not a weeknight kitchen.
The recipe itself comes from a treasured collection passed down through the years on the farm. It’s simple enough for kids to help with and forgiving enough that first-timers get great results.

Why You’ll Love This Chocolate Apple Recipe
Making chocolate covered apples at home is easier than most people expect, and the difference between homemade and store-bought is hard to overstate. With a few pantry staples and about 30 minutes, you control every ingredient, every topping, and every detail. The combination of Bee Inspired Honey with chocolate creates a coating that’s smooth, glossy, and rich in a way that store-bought versions can’t touch.
This recipe is a natural fit for:
- Fall family activities and weekend kitchen projects with kids
- Halloween parties, harvest gatherings, and trick-or-treat dessert tables
- Homemade gifts wrapped in cellophane with a ribbon
- After-school snacks that feel a little more special than usual
Ingredients for Chocolate Covered Apples
For this easy chocolate covered apples recipe, here’s what you’ll need:
- Bee Inspired Honey: adds smooth sweetness and helps the coating set with a glossy finish
- Granulated cane sugar
- Unsalted butter
- Unsweetened baking chocolate squares
- Pure vanilla extract
- 6 to 8 tart, crisp apples (Granny Smith or Honeycrisp work beautifully)
- Chopped nuts for coating (pecans, walnuts, or peanuts)
- Popsicle sticks or sturdy wooden skewers

Looking for a flavor twist? Try Coffee Blossom Honey in place of a standard variety. Its waxy, floral, caramel-edged profile plays beautifully against the chocolate.
How to Make Chocolate Covered Apples
Step 1: Make the Chocolate Coating
In a medium saucepan, combine the honey and sugar over low heat. Add the butter and unsweetened chocolate, stirring continuously until everything is fully melted. Keep the heat gentle so nothing scorches. Continue cooking over medium heat for 10 to 15 minutes, stirring often, until the mixture is completely smooth and glossy. Stir in the vanilla extract and remove from the heat.
Step 2: Prep and Dip the Apples
Wash and thoroughly dry each apple. Any moisture left on the skin will keep the chocolate from adhering, so this step matters. Insert a popsicle stick firmly into the stem end of each apple, pushing it about halfway down. Dip each apple into the warm chocolate, rotating to coat the surface completely. While the coating is still wet, roll the apple in chopped nuts (or whichever topping you’re using). Set each finished apple on a wax-paper-lined plate or sheet pan, making sure they don’t touch each other as they set.
Step 3: Serve and Store
Chocolate covered apples keep for up to three days when stored in an airtight container in the refrigerator. Serve them cold for the best texture: the chocolate firms up into a glossy shell that gives way to crisp, tart apple in one satisfying bite.

Tips for Perfect Homemade Chocolate Apples
Choose the right apples. Tart varieties like Granny Smith balance the sweetness of the chocolate beautifully. Honeycrisp works too if you want something a touch sweeter and snappier. Whichever you pick, the apples should be firm, fresh, and unwaxed when possible (a quick scrub under warm water helps remove any commercial wax coating that would interfere with the chocolate).
Mind the temperature. The chocolate mixture should be warm enough to dip smoothly but not so hot that it slides right back off the apple. If it thickens too much as you work, set the pan back over low heat for a minute to loosen it up.
Work quickly. Once an apple is dipped, roll it in toppings immediately, before the coating starts to set. A second pair of hands helps if you’re doing a big batch.
Get creative with toppings. Beyond chopped nuts, try crushed pretzels, sprinkles, mini chocolate chips, toasted coconut, or a drizzle of melted white chocolate over the top. For a party platter, set up a small toppings bar and let everyone customize their own.
Choosing the Right Honey for Chocolate Apples
The honey you choose doesn’t just sweeten the coating, it shapes the flavor. Wildflower Honey is the most versatile choice and works in almost any chocolate-forward recipe, with bold, layered character that holds its own against the cocoa. For something more distinctive, Coffee Blossom Honey brings caramel-edged complexity that reads almost like toffee against the chocolate. If you’d rather not pick on your own, the Eastern Shore Honey Collection has a varietal for every kitchen.
Making Memories with Chocolate Covered Apples
Half of what makes this recipe worth doing is the doing itself. Kids love everything about it: inserting the sticks, choosing the toppings, swirling the apples in the chocolate, watching them set on the tray. It’s the kind of weekend project that turns into a tradition without anyone planning it that way. The treats are great, but the time in the kitchen is the real reason to make them.
Looking for more autumn favorites? Try our Homemade Caramel Corn, our Honey Baked Apples, or explore our complete collection of easy fall dessert recipes sweetened with honey.
More Fall Favorites with Honey
Once you’ve mastered chocolate covered apples, keep the seasonal momentum going:
- Honey Caramel Sauce: spoon it over ice cream, drizzle it on apple slices, or stir it into hot drinks
- Apple Cider Margarita: the grown-up sipper that pairs naturally with this dessert
- Fall Recipes Collection: the full lineup of cozy autumn cooking with honey
Ready to make a batch? Grab a jar of Eastern Shore Honey and let’s get started.

Chocolate Covered Apples FAQ
What are the best apples for chocolate covered apples?
Tart, crisp varieties like Granny Smith and Honeycrisp work best because their bright acidity balances the sweetness of the chocolate coating. Pick apples that are firm and fresh, and give them a quick scrub under warm water to remove any commercial wax coating that would keep the chocolate from sticking.
How long do chocolate covered apples last?
Chocolate covered apples keep for up to three days when stored in an airtight container in the refrigerator. Serve them cold for the best texture, since the chocolate firms up into a glossy shell when chilled.
Can you make chocolate covered apples ahead of time?
Yes. You can make them up to three days in advance and store them refrigerated in an airtight container. For the cleanest presentation, let the coating set fully on a wax-paper-lined tray before transferring them to a container so the chocolate finish stays smooth.
Do chocolate covered apples need to be refrigerated?
Yes. Refrigerate chocolate covered apples once the coating has set, both to keep the fruit fresh and to maintain the firm, glossy texture of the chocolate shell. Leaving them at room temperature for long stretches can soften the coating and shorten how long the apples stay crisp.
What kind of chocolate is best for dipping apples?
This recipe uses unsweetened baking chocolate combined with honey, butter, and sugar to create a smooth, glossy coating that sets up firm. The honey gives the mixture a richer flavor than chocolate chips alone and helps the coating cling to the apple without sliding off.
Why won’t my chocolate stick to the apples?
The most common reason is moisture or wax on the apple skin. Wash apples thoroughly, then dry them completely with a clean towel before dipping. If the apples have a commercial wax coating, scrub them gently under warm water first. The chocolate also needs to be warm enough to coat smoothly but not so hot it slides right back off.