If you've ever made gingerbread cookies and thought something's missing — a little more depth, a little more warmth, something that makes the spices really sing — there's a good chance you haven't baked them with buckwheat honey yet.
This is the recipe we pull out every holiday season, and it hasn't changed much over the years. It uses both molasses and buckwheat honey in the dough, and that combination — dark, malty, just a little earthy — is what sets these cookies apart from every other gingerbread recipe you've tried. Lighter honey varieties are wonderful in many applications, but gingerbread is one of those places where buckwheat honey earns its reputation. The bold flavor profile doesn't just tolerate the warm spice blend; it amplifies it.
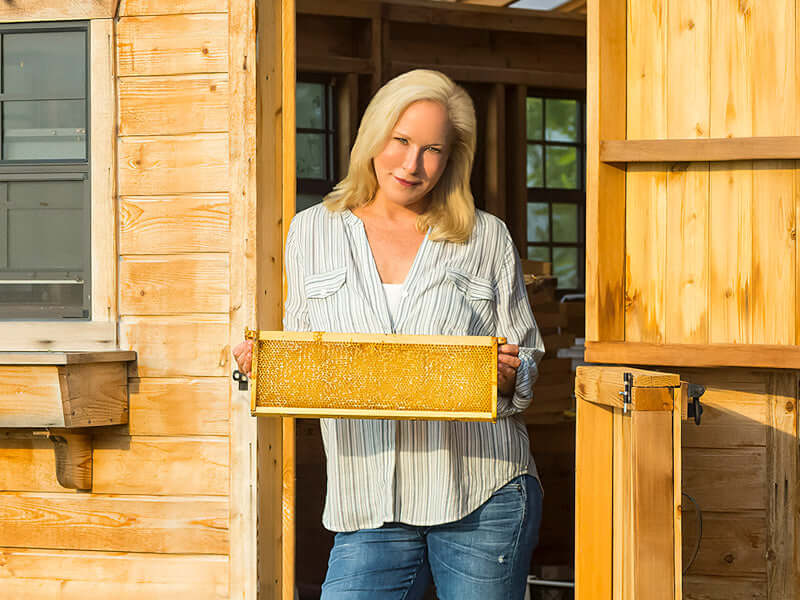
New to buckwheat honey? Here’s everything you need to know about this bold, dark varietal before you bake.
The cookies hold their shape, stay soft for days, and are forgiving enough for bakers at any skill level. The dough does need chilling — plan for a few hours or overnight — but the actual hands-on work is simple, and the results are very much worth it.

Why Buckwheat Honey and Gingerbread Are a Natural Match
Gingerbread is built on bold flavors: ginger, cinnamon, cloves, nutmeg, a whisper of black pepper. It has enough going on that it can stand up to ingredients with real personality. Lighter, floral honeys tend to get a little lost in that spice environment. Buckwheat honey doesn't.
Our Buckwheat Honey has an intensely rich, malty flavor with deep, earthy undertones and a molasses-like finish. When you use it alongside the molasses already in this recipe, the sweetness becomes layered rather than one-note. The buckwheat's depth plays directly off the warmth of the ginger and the slight bitterness of the cloves in a way that brings everything into focus. These are cookies people ask about.
There's also a practical reason buckwheat honey works beautifully in baked goods: honey is a natural humectant, meaning it attracts and holds onto moisture. That's why these cookies stay soft and tender for several days after baking — no dry, crumbling gingerbread. If you've been baking with honey for a while, you already know this trick. If you're newer to it, gingerbread cookies are one of the best places to see it in action.

Ingredient Notes: What You're Using and Why
The ingredient list here is classic, but a few things are worth knowing before you start. Small choices — butter temperature, dough rest time, honey variety — make real differences in the final result.
All-purpose flour (2¾ cups). Standard AP flour gives these cookies just enough structure to hold their shape when cut and baked while staying tender. Bread flour would make them tougher; cake flour would make them too delicate to work with. Stick with AP.
Baking powder and baking soda (both). Using both leaveners gives the cookies a slight lift without making them puffy. The baking soda also helps with browning. Don't substitute one for the other.
The spice blend. One tablespoon of ground ginger is not a typo. Gingerbread needs a generous hand with the ginger, or it just tastes like a spiced brown sugar cookie. The cinnamon rounds out the heat; the cloves and nutmeg add depth; and the small amount of black pepper — optional, but worth it — sharpens everything and lingers pleasantly on the finish. Use fresh spices if yours have been in the cabinet since last year; old spices make flat-tasting cookies.
Unsalted butter (2 sticks), softened. Two full sticks is what gives these cookies their rich, indulgent character. Softened butter — truly at room temperature, not just slightly cool — is what allows it to cream properly with the sugar. If your butter is still cold when you beat it, the dough will be harder to work with and the cookies may spread unevenly. Plan ahead and leave it out for at least an hour.
Dark brown sugar (¾ cup, packed). Brown sugar contributes a background molasses note of its own, which layers with the honey and molasses in the dough. Dark brown sugar has more molasses than light brown sugar, which means more depth. If you only have light brown sugar, it works — the flavor will just be a touch milder.
Molasses (¼ cup). Traditional gingerbread isn't gingerbread without it. Molasses is responsible for that characteristic dark color, the slightly bitter edge, and the chewy texture. The combination of molasses and buckwheat honey in equal parts is what makes this recipe distinctive — each one reinforces what the other is already doing.
Buckwheat honey (¼ cup). This is where the recipe departs from the standard. Our Buckwheat Honey has a malty, earthy flavor profile — notes of dark caramel and a finish that echoes the molasses — and that's precisely why it belongs here. At a quarter cup, it contributes real flavor without overwhelming the spice blend. If you want to explore other honeys from our Eastern Shore collection, a darker varietal will always perform better in gingerbread than a light, floral one. But buckwheat is the one we'd reach for every time.
Egg (1 large). Binds the dough and contributes to the structure of the finished cookie. Make sure it's at room temperature before adding — cold eggs can cause the butter mixture to seize up slightly.
Pure vanilla extract (2 teaspoons). Don't skip this. Vanilla rounds out the flavor and softens some of the sharper edges in the spice blend. It's subtle but noticeable in its absence.

Step-by-Step: How to Make Buckwheat Honey Gingerbread Cookies
Before you start: the dough needs to rest at room temperature for a couple of hours and then chill in the refrigerator for at least two more hours, or overnight. This chilling step is not optional — it's what keeps the cookies from spreading into flat, shapeless rounds. Budget the time, make the dough the evening before if that's easier, and the actual baking will go quickly and smoothly.
First: Mix the Dry Ingredients
In a medium bowl, whisk together the flour, baking powder, baking soda, salt, ground ginger, cinnamon, cloves, nutmeg, and black pepper until everything is evenly distributed. You want to make sure the leaveners and spices are thoroughly incorporated before the wet ingredients come in — this prevents any pockets of baking soda or uneven spice distribution in the finished cookies. Set the bowl aside.
Second: Cream the Butter and Sugar
In a large mixing bowl, beat the softened butter and dark brown sugar together on medium speed until the mixture is light and fluffy — give it at least two to three minutes. This step builds the base of the texture; properly creamed butter and sugar means a more tender, even cookie. Add the egg and beat until just combined, then scrape down the sides of the bowl.
Third: Add the Honey, Molasses, and Vanilla
Mix in the molasses, buckwheat honey, and vanilla extract until the mixture is smooth. The batter will turn a deep, rich brown at this point — that's the buckwheat honey and molasses doing exactly what they're supposed to do. The aroma at this stage is already something: earthy, sweet, warm, with that characteristic buckwheat depth cutting through.
Fourth: Bring the Dough Together
Gradually add the dry ingredient mixture to the wet ingredients, mixing on low speed. Continue to mix until the flour is fully incorporated and the dough is smooth. Be careful not to overmix — once the flour is blended in, stop. Overworked dough develops more gluten, which can make the cookies tough rather than tender.
Fifth: Rest and Chill the Dough
Divide the dough into four equal portions. Wrap each one tightly in plastic wrap and let them rest at room temperature for a couple of hours. Then move them to the refrigerator for at least two more hours — or overnight, if you're planning ahead. This two-stage rest matters: the room-temperature rest helps the flavors develop; the refrigeration firms up the fat in the dough so the cookies hold their cut edges when they go into the oven. The dough keeps well in the refrigerator for a few days, so don't feel like you have to bake it all at once.
Sixth: Roll and Cut
When you're ready to bake, preheat your oven to 375°F (190°C) and line your baking sheets with parchment paper or a silicone baking mat.
Take one portion of dough from the refrigerator and let it sit for a few minutes at room temperature to become slightly more pliable. Working on a lightly floured surface, roll to about ¼-inch thickness. Consistent thickness is important here — thin spots bake faster than thick spots, and uneven cookies mean some are over-baked while others are still underdone. Use guide rings on your rolling pin if you have them. Cut out shapes with your favorite cookie cutters.
Seventh: Bake One Sheet at a Time
Place cut-out cookies on your prepared baking sheet with about 2 inches of space between them. Bake one sheet at a time for 6 to 9 minutes. You're looking for edges that look set and dry while the centers still appear slightly soft — the cookies will firm up considerably as they cool on the pan. Your first batch is always the test batch with any oven, so watch it closely. An extra minute or two can be the difference between soft-centered and crisp all the way through.
Eighth: Cool Completely Before Decorating
Let the cookies rest on the baking sheet for a few minutes before transferring them to a wire rack. They need to cool completely — not just until they feel cool to the touch, but fully room temperature — before you decorate. Applying icing to a warm cookie will cause it to melt and run rather than set cleanly.

Decorating Your Gingerbread Cookies
Decorating is the part that turns baking into an event. Royal icing is the classic choice for cut-out cookies because it dries hard and fast, which means you can stack and package cookies without smearing your work. It's also easy to tint with gel food coloring if you want to add color.
To make a basic royal icing, whisk powdered sugar with a small amount of milk or water and a splash of vanilla until smooth. The consistency is what matters: thicker icing (less liquid) holds its shape and is best for outlining or piping details. Thinner icing (a little more liquid) floods larger areas smoothly. Many decorators make both — outline first, let it set briefly, then flood the interior.
If you're doing this with kids, a simple option is to skip the two-consistency approach entirely and just make one medium-thick icing. Spread it on with a butter knife or small spatula, then press in sprinkles or cinnamon candies before it sets. Less precise, more fun.
Sugar pearls look beautiful on these cookies and add a gentle crunch. Sanding sugar pressed onto wet icing adds sparkle. A drizzle of additional buckwheat honey over plain cookies (no icing) makes for a rustic, farmhouse-style presentation that shows off the honey rather than hiding it.
Baker’s Tips for Success
Don't shortcut the chill. This is the single most important piece of advice. If the dough is too soft when it goes in the oven, the butter melts before the structure sets and you get flat, spread-out cookies that don't look like much and bake unevenly. Chilled dough holds its edges, bakes more evenly, and is genuinely easier to roll and cut.
Roll between two sheets of parchment. If your dough sticks to the surface even after chilling, place it between two sheets of parchment paper before rolling. This keeps extra flour out of the dough (which can make cookies dry and tough) and makes cleanup much easier.
Re-chill between batches. As you work through the dough, it will warm up from the heat of your hands. If it starts feeling sticky or the cut-outs aren't holding their shape cleanly, rewrap the portion you're working with and refrigerate it for ten minutes before continuing.
Making ornaments. Punch a small hole near the top of each cookie with a drinking straw before baking. The hole closes slightly in the oven, so make it a bit larger than you need. Use a toothpick to clean up the edges once the cookies come out of the oven while they're still warm.
For the cleanest cut edges. Dip your cookie cutters in a little flour before pressing them into the dough. This prevents sticking and gives you sharper, cleaner cookie edges.
Re-rolling scraps. Gather dough scraps, press them into a disk, and refrigerate for 10 to 15 minutes before re-rolling. Dough that has been re-rolled once is completely fine. Multiple re-rolls will make the cookies progressively tougher, so try to cut as many shapes as possible from each portion before gathering scraps.

How to Store, Freeze, and Make Ahead
One of the best things about this recipe is how well it works for advance baking. The dough keeps, the baked cookies keep, and the flavors actually deepen a day or two after baking — which means these are ideal for holiday planning.
Storing baked cookies at room temperature. Fully cooled, undecorated cookies — or decorated cookies with fully dried icing — keep in an airtight container at room temperature for up to a week. The honey in the dough keeps them soft and tender, and they're genuinely just as good on day five as they were on day one.
Freezing baked cookies. Undecorated baked cookies freeze beautifully. Layer them in a freezer-safe container with parchment paper between layers and freeze for up to three months. Thaw at room temperature for about an hour before decorating or serving.
Freezing the raw dough. Wrap each plastic-wrapped dough portion in a freezer-safe bag and freeze for up to three months. Move to the refrigerator to thaw overnight before rolling and baking. This makes it easy to have holiday cookies ready to bake with minimal advance prep during the busy season.
Gifting these cookies. Because they stay soft and travel well, these are one of the best cookies for giving. Pack them in a tin or bakery box with parchment between layers. A small card with the buckwheat honey note is a nice touch — most people won't know what makes the flavor different, and it's a fun detail to share.

More Ways to Bake with Buckwheat Honey
If these cookies are your first time using buckwheat honey in baking, they won't be your last. The same depth that makes it shine in gingerbread works beautifully in other recipes that can handle a bold honey profile. Our honey banana bread is a natural next step — the malty undertones of buckwheat honey echo the natural caramel sweetness of ripe bananas in a way that makes the bread taste richer than it has any right to. The banana yogurt muffins follow the same logic and come together in under 30 minutes of active time, which makes them a great weekday baking project. If you've never tried buckwheat honey in a savory context, the hot buckwheat cereal with honey is worth exploring — the flavor combinations there will genuinely surprise you.
Planning a full holiday baking session? Our complete holiday cookie recipes roundup has plenty more ideas, all made with honey.
Ready to get started? Grab a jar of Bee Inspired Buckwheat Honey and let us know how they turn out.


FAQs About Best Honey Gingerbread Cookies Recipe
What does buckwheat honey taste like in gingerbread cookies?
Buckwheat honey has a bold, malty flavor with a deep, earthy finish that some people describe as similar to molasses or dark caramel. In gingerbread, that profile reinforces the dark, warming qualities of the molasses and brown sugar already in the recipe rather than competing with them. The result is a cookie that tastes more complex and fully realized than one made with a lighter honey — you taste the spices more clearly, the sweetness has texture and depth, and the finish lingers in a satisfying way.
Can I substitute a different honey if I don't have buckwheat?
Yes, any honey will work in this recipe. That said, the honey variety you choose will affect the flavor. Buckwheat honey is recommended here because its malty depth pairs so naturally with the molasses and warm spices. If you use a lighter honey — wildflower, clover, orange blossom — the cookies will still be delicious, but the flavor will be somewhat milder and less distinctive. The general rule is: the darker the honey, the more presence it will have in a baked good with strong competing flavors.
Can I use buckwheat honey instead of molasses in this recipe?
You can, but we'd encourage you to keep the molasses and just add the buckwheat honey as written rather than substituting one for the other. Molasses does specific things in gingerbread that honey alone doesn't replicate — it contributes the characteristic dark color, a particular chewy texture, and a faint bitter edge that balances the sweetness. The combination of both, each at a quarter cup, is where this recipe finds its balance.
Why does the dough need to be refrigerated before baking?
Chilling the dough is essential for cut-out cookies, and it accomplishes a few things at once. Cold butter stays solid longer in a hot oven, which means the cookies hold their cut edges as they bake rather than spreading out. Chilled dough is also much easier to roll and cut cleanly. And the extended rest time gives the flavors a chance to develop — the spices, honey, and molasses all get more integrated and harmonious after a night in the refrigerator.
How can I tell when gingerbread cookies are done?
Look at the edges: they should appear dry and set, with a slightly firmer texture than the center. The centers will still look a little soft and maybe slightly underdone — that's correct. They will firm up significantly as they cool on the baking sheet. If you wait until the centers look fully set in the oven, the edges will be over-baked. Start checking at 6 minutes; in most ovens, 7 to 8 minutes hits the sweet spot for a soft, chewy result.
Why are my gingerbread cookies spreading too much?
Spreading is almost always a chilling problem. If the dough wasn't cold enough when it went in the oven, the butter melts quickly and the cookies spread before the structure has a chance to set. Make sure you're chilling for the full recommended time — at least two hours, ideally overnight. If the dough has warmed up during rolling and cutting, slide the tray into the refrigerator for 10 to 15 minutes before baking.
How long do honey gingerbread cookies stay fresh?
Properly stored in an airtight container at room temperature, these cookies stay soft and fresh for up to a week. The honey in the dough is a natural humectant, which means it helps the cookies retain moisture over time. If you've decorated the cookies with royal icing, make sure the icing is completely set and dry before closing them in a container. Undecorated cookies freeze beautifully for up to three months.
Can I make the dough ahead of time?
Absolutely, and we'd actually encourage it. The dough can be made up to three days in advance and kept tightly wrapped in the refrigerator. The extended rest only improves the flavor — the spices continue to bloom and the sweeteners meld together more fully. For longer advance prep, the dough freezes well for up to three months wrapped tightly and sealed in a freezer bag. Thaw it overnight in the refrigerator before rolling and baking.
What royal icing consistency should I use for decorating these cookies?
The most flexible approach is to make one batch of royal icing and divide it into two consistencies. Keep a portion thick — about the texture of toothpaste — for outlining and adding fine details. Then thin the remainder with a small amount of water or milk until it flows smoothly off a spoon for flooding larger areas. To test flooding consistency, drag a toothpick through the surface: it should close back over and become smooth within about ten seconds. Gel food coloring works best for tinting royal icing — liquid food coloring can thin the icing too much.