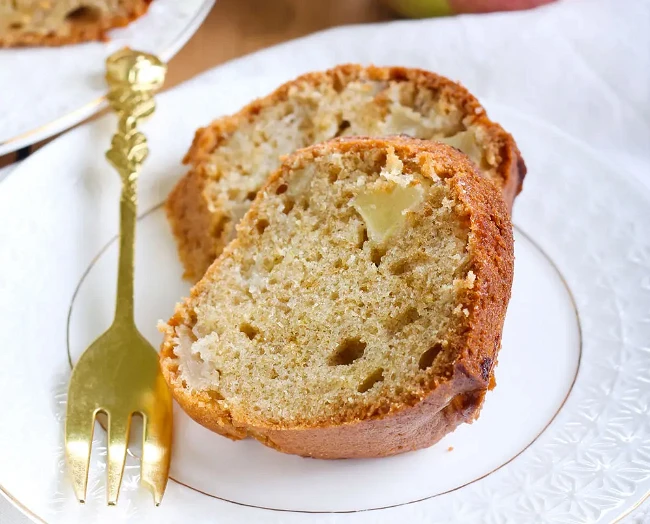
Apple cake for Rosh Hashanah isn’t just a dessert; it’s a tradition. With this Jewish apple cake recipe we’ll get into the cultural significance of apple cake for the holiday and walk you through Aunt Jane’s family recipe.
Rosh Hashanah with Apple Cake: Jewish Recipe
Rosh Hashanah, the Jewish New Year, is a time to celebrate and contemplate. Sweetening those moments with a Jewish cake, specifically apple honey cake, makes it even sweeter. The Jewish apple cake is more than just a tasty treat, it’s a tradition that’s been passed down for generations. As the seasons change and apples are at their peak, the Jewish apple cake is an absolutely delicious part of the holiday. I can’t think of a better way to start the New Year than the best Jewish apple cake recipe!
The cake is more than just taste, it’s a tradition that brings families, friends and communities together. It’s a culinary ritual, a time to share stories and make memories over a slice of this cake. Each bite is a testament to tradition and to sharing.
The Jewish apple cake is a Rosh Hashanah classic, but it’s also a bridge between old and new, tradition and innovation, between the sweetness of the past and the promise of the future. This delicious apple cake is perfect for Rosh Hashanah and can be enjoyed all year round.
Apples and honey represent a sweet and fruitful new year while celebrating Rosh Hashanah
The Story Behind the Cake
The Jewish apple cake is a tradition. As a dessert for Rosh Hashanah it’s a sweet start to the year. But the cake isn’t just about symbolism, it’s about experience. The process of making the cake, the smell of it baking in the kitchen and sharing it with loved ones - all that is part of the tradition that’s as much a part of Rosh Hashanah as the cake itself.
This is more than a dessert. It’s a story, a tradition and a piece of heritage passed down through generations. It’s about family, heritage and the bonds that food can create. It’s the taste of tradition, the sweet promise of a new year and the warmth of family all baked into one cake.
Aunt Jane
The story of our Jewish apple cake recipe begins with Aunt Jane, a woman known for her cooking and her big heart. Aunt Jane was famous in our family for her apple cake, a recipe that became a family favorite. Her secret ingredient? Her tiny little hands. They measured the ingredients, mixed the batter and baked a cake that could only be the result of love and tradition.
Aunt Jane was more than just a great baker. She was a rock, a beacon and a example of giving back. She spent most of her life volunteering, helping the mentally handicapped and her local hospital. Her legacy lives on not just in her apple cake but in her spirit of charity and community.
Choosing the Apples
Of course apples are the star of the show in any apple cake. The type of apples you choose can make a big difference in your cake. For our Jewish Apple Cake we recommend tart Granny Smith apples to balance out the sugar in the recipe. But don’t stop there! By using a mix of Granny Smith, Gala or Honeycrisp apples you can add more flavor and texture to the cake.
The key is to choose apples that are firm-tart or firm-sweet like:
-
Granny Smith
-
Fuji
-
Gala
-
Pink Lady
-
McIntosh
-
Cortland
-
Honeycrisp
These apples hold their shape while baking so you’ll get a perfect texture in your cake. So next time you’re in the produce aisle don’t just grab any apples. Choose with care because the best apple cake starts with the best apples!
Remember the cake’s appeal isn’t just in the apples but in the balance of flavors they bring. So take a moment to think about the flavor profile you want in your cake. Do you want a tart kick to contrast the sweetness of the cake? Or do you want a sweeter profile to complement the other ingredients? The choice is yours!
Tart vs. Sweet: Balancing Flavors
Flavor balancing is an art especially in apple cake where the balance of tart and sweet is everything. The tartness of the Granny Smith apples against the sweetness of the cake is a flavor profile that’s balanced and interesting.
But why stop at one type of apple? Mixing tart and sweet apple varieties can create a well rounded flavor profile for the cake. The contrast between tart apples like Granny Smith and sweeter varieties is key to getting the perfect taste in apple cake. So don’t be afraid to mix and match your apples. After all variety is the spice of life!
Slicing Apples for Texture
Now that you’ve chosen your apples the next step is to slice them. How you slice your apples can make a big difference in your apple cake. Thinner slices will disintegrate during baking and thicker slices will not bake evenly. So what’s the answer? Aim for uniform slices so you get even baking and perfect texture every time.
But slicing apples is not just about getting the right thickness. To keep your sliced apples from browning toss them in lemon juice or vinegar right after slicing. And remember a sharp knife is essential for clean cuts to preserve the texture of your apples. So slice with care because your apple slices are not just ingredients they’re the stars of your cake!
The Ultimate Jewish Apple Cake Recipe
Now that we’ve covered the basics we can move on to the fun part – making the ultimate Jewish Apple Cake. Our recipe from Aunt Jane is a flavor and texture bonanza, a testament to the power of simplicity and tradition. This dense cake is known for its moistness and requires a longer baking time because of its density.
First we mix the dry and wet ingredients separately. This means sifting together the flour, baking powder, sugar and salt and whisking together the oil, eggs, honey, vanilla and orange juice. Then comes the best part – layering the batter and apples in the pan! This way every slice of cake will have tender juicy apples throughout.
Baking the Jewish Apple Cake is a labor of love but the results are worth it. After about 60 minutes in the oven you’ll have a cake that’s perfectly golden and moist. But the beauty of this cake is not just in the taste but in the joy it brings to those who share it.
How to Make Jewish Apple Cake
These are the basics to get the classic Jewish Apple Cake.
But you can get creative too! Add lemon juice to the apples and sprinkle granulated sugar before baking to get extra flavor. Every ingredient from the tart apples to the sweet orange juice is a player in this special cake.
Ingredients
The magic of the Jewish Apple Cake is in the ingredients. The main ones are:
-
Granny Smith Apples
-
Sugar and Eastern Shore Honey
-
Ground Cinnamon
-
All-Purpose Flour
-
Baking Powder
-
Salt
-
Vegetable Oil
-
Orange Juice
-
Vanilla Extract
-
Eggs
Step 1: Getting Ready
Measure out your ingredients before you start for a smooth process. Slice the apples, and preheat your oven to 330 degrees.
Step 2: Prepare the Filling
Mix your chopped apples with honey, sugar, and cinnamon in a medium bowl. Our recipe calls for 2 tbsp of sugar in this step. However, if your apples are super sweet, you can use less sugar.
Step 3: Mix Dry Ingredients
Using a large mixing bowl, sift together flour, baking powder, sugar, and salt. You'll want to use a large bowl because you'll be adding the wet ingredients once they're mixed.
Step 4: Mix Wet Ingredients
In a medium bowl, combine the honey, oil, eggs, orange juice, and vanilla. Use a hand mixer to be sure they are thoroughly combined.
Step 5: Combine Dry and Wet
Fold the wet ingredients into the dry ingredients. Be sure to mix well to ensure you create a homogenous cake batter.
Step 6: Fill your Pan with Batter
Grease and flour a tube pan. Pour a layer of batter into your prepared pan. Add a layer of apples on top of the batter. Repeat this pattern as many times as necessary.
Step 7: Decorate
Once your pan is full, create a decoration of apples on top of the cake batter if you are feeling creative. Sprinkle with a little sugar and cinnamon if desired.
Step 8: Bake
Once your oven is finished preheating to 330 degrees, bake your cake for approximately 1 hour. For the last 10 minutes of baking, raise the oven temperature to 350 degrees to help firm up the cake.
Step 9: Cool
After your cake is thoroughly cooked, take it out of the oven and let it cool in the pan for 15 minutes. Remove the cake from the pan and allow it to cool completely on racks.
Remember good things take time and the Jewish Apple Cake is no exception!
Getting the Cake Out of the Pan
When baking your Jewish Apple Cake think about how you will get the cake out of the pan. A 10-inch tube pan or a standard 10 to 12-cup Bundt pan is recommended for easy removal. Before adding the batter spray the pan well with cooking spray. That way your cake will come out easily and will retain its shape and texture.
If your apple cake sticks to the pan don’t worry! You can follow these steps to get it out of the pan easier:
-
Use a plastic knife to loosen the cake around the center tube and the sides.
-
Lift the cake out of the pan carefully using a spatula if needed.
-
Place the cake on a serving plate or cooling rack.
Customizing Your Jewish Apple Cake
One of the best things about baking is the ability to be creative and customize. The Jewish Apple Cake is no different! Add other fruits and berries, try different types of honey, add different seasonings, the possibilities are endless.
We all know how important honey is in this apple cake recipe. Different types of honey can add different flavors to your cake:
-
Spring Honey - brightly floral, sweet, and pollen-like in flavor
-
Sourwood Honey - velvety, sweet, smooth, and caramel-like flavor profile
-
Autumn Honey - rich, fruity and earthy flavor
Looking for a natural sweetener? Try using maple syrup or applesauce instead of refined sugar. These have antioxidants and add a different flavor to the cake.
But that’s not all. You can also experiment with different flours like almond or whole wheat to create your own flour blend and change the texture of the cake. And for a decadent finish consider drizzling icing or caramel sauce on top.
So get creative and make this cake your own!
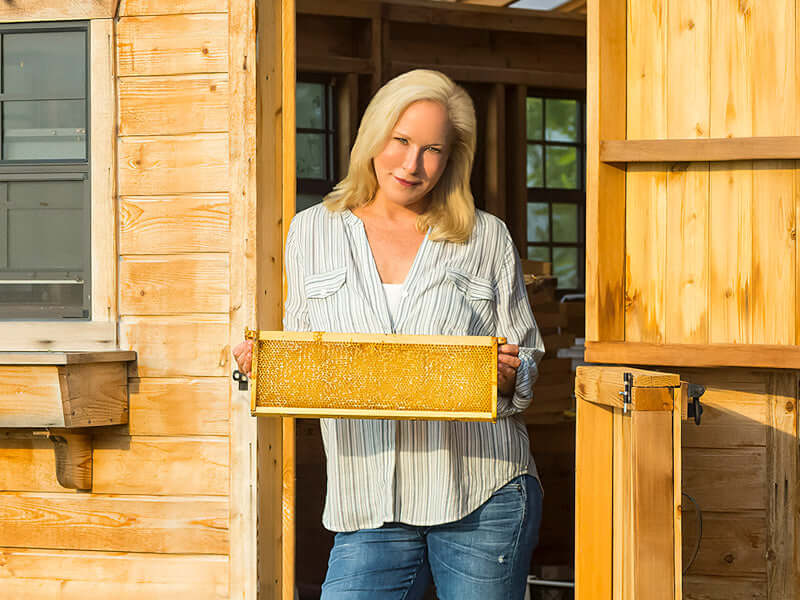
All of our honey at Bee Inspired is pure, raw, and Certified Kosher
Creative Icing Options
For a sweet finish to your Jewish apple cake try a creative icing. A homemade salted honey glaze or a thick vanilla icing can be brushed or drizzled over the cooled cake for a glossy finish and extra flavor.
But remember when it comes to icing you should let the cake cool completely so the icing doesn’t melt off. Once your cake is cool and ready go ahead and get creative! Whether it’s a dusting of powdered sugar or your own creation a little icing can go a long way in flavor and presentation of your Jewish apple cake.
Storing and Serving Suggestions
After you bake and cool your Jewish apple cake, consider your storing and serving options. Proper storing is key to keeping the cake moist and delicious - especially if you're making it ahead of time. Whether you’re storing it at room temperature for a few days or in the freezer for long term storage there are a few things you should keep in mind to keep your cake tasting its best.
Remember refrigerating the cake can dry it out so try to avoid that. Instead, wrap the cake tightly in plastic wrap or aluminum foil and store it at room temperature to keep it fresh and moist. If you’re storing it in the freezer make sure it’s well wrapped to prevent freezer burn.
Presentation and Serving Tips
In baking presentation is as important as taste. And with a little extra attention to detail you can make your Jewish Apple Cake look as good as it tastes. From choosing the right pan to adding decorative touches there are many ways to make your cake a visual feast.
Taking the occasion and your guests into consideration when serving your Jewish apple cake is essential for proper presentation and enjoyment. Serve it plain to let the natural flavors shine or top it with a scoop of vanilla ice cream or a dollop of whipped cream for an extra special treat.
When decorating the cake don’t be shy. A sprinkle of powdered sugar, a handful of chopped apples or a drizzle of caramel sauce can turn your cake into a work of art.
For a glossy finish and extra flavor try brushing or drizzling glazes such as a honey mixture thinned with water or a thick vanilla icing over the cooled cake. So go ahead let your creativity shine and make your Jewish Apple Cake a feast for the eyes as well as the palate!
Our Honey Sticks create a mess-free way to drizzle your honey on top, plus each one contains one serving size
Keeping Leftovers Fresh
In the case that you have leftovers (which is highly unlikely for this recipe!), you want to make sure you store your Jewish apple cake properly so that it stays moist. Along with with above suggestions, you can put the wrapped cake in an airtight container for extra protection. This will help preserve the moisture content and keep it fresh for longer.
A little care in storing your cake goes a long way in keeping it moist and tasty!
For Different Diets
We know that dietary needs and preferences are different for everyone. That’s why we’re giving you tips on how to modify the Jewish Apple Cake recipe to fit your needs. From natural sweeteners to gluten free flour options, there are many ways to make this recipe without sacrificing taste.
Gluten Free Flour Options
For those who are gluten free don’t worry! There are many options to wheat flour that you can use in your Jewish Apple Cake. You can use:
-
A 1:1 gluten free flour blend as a direct substitute for wheat flour
-
Almond flour
-
Coconut flour
You may need to adjust the amount and liquid.
These flours will change the texture of the cake slightly but they will make the cake gluten free for those with gluten sensitivities. So don’t let dietary restrictions hold you back. With a little creativity you can make a delicious gluten free Jewish Apple Cake that everyone can enjoy!
Sweetener Options
Many options to refined sugar for sweetening your Jewish Apple Cake. Read up on Baking with Honey to learn how to swap out honey for sugar. Natural sweeteners like coconut sugar, stevia and monk fruit extract will give you a healthier option, fruit derived sweeteners like allulose and sugar alcohols like erythritol and xylitol will add sweetness without the calories.
Will You Make Apple Cake?
We’ve explored the history of Jewish Apple Cake from Rosh Hashanah to Aunt Jane’s recipe. We’ve looked at how to choose the right apples, make the perfect Jewish Apple Cake and modify it to your taste. We’ve given you tips on storing and serving the cake, displaying it and adapting the recipe to different diets.
Making a Jewish Apple Cake is more than just baking; it’s a tradition, a community and a sweet way to share. So as you make this recipe your own remember to bake with love, share with joy and savor every bite.
More Apple Recipes
If you like the flavors of our Jewish Apple Cake why stop there? Apple season offers many desserts to enjoy during holidays and beyond. Here are some apple desserts to try:
- Apple Spice Cake - a spicy twist on this recipe!
Want more desserts that compliment your other Rosh Hashanah food? Check out our blog dedicated to our favorite Rosh Hashanah desserts that follow Jewish dietary laws!